Showing posts with label craft. Show all posts

Tuesday, September 30, 2014

Come Unto Christ

The 2014 theme for our church youth was "Come Unto Christ". We are preparing for our Young Women in Excellence, an annual celebration of the year's goals and accomplishments by our amazing young women. I was put in charge of the podium/front of the room display. Here's my idea for a visual focal point.


Materials
(I got all the materials at Hobby Lobby, a nationwide chain craft store.)
  • Letters. I chose a wooden C and the other letters are metal. I liked how they fit on the canvas and how they looked overlapping.
  • Painters canvas. Mine measured 20"x24", but you select the size based on your letters.

  • E6000 glue. I didn't trust my glue gun to hold the letters onto the canvas. This works *EVERY* time.

  • Swirly flourish stickers. I picked mine to accent the letter "C" in black. I used 2 packs.

  • Gold spray paint. I tried to use other acrylic type paint, but it just looked messy. Use the spray paint for a clean finish and sharp edges on the chevron pattern.
  • 1/2" painters tape to mask off the chevron pattern on the canvas. I used blue tape as you can see in the next pictures.

Instructions


1. Measure your chevron pattern and mask off the lines. Don't forget to wrap around the edge of the canvas. Rub that tape down so that the edges will be crisp.

2. Spray paint the whole thing. Don't forget the edges! Let dry (about 20 minutes) then peel off the tape.


3. Lay out your letters on the canvas. You can even use vinyl lettering, of course.


4. Once you are happy with the placement of the letters, glue them down.

5. Add the sticker embellishment. I also added vinyl letter cut outs.
6. Display proudly.


Thursday, October 31, 2013

Halloween Mantle

Soooooo... let's just say that life has been very busy lately. But here's a craft I made for Halloween last year that I thought I'd share. It's my favorite BOO sign.

  1. Bought a cheap frame from Goodwill, removed the glass, and spraypainted it black.
  2. Used spray adhesive on the frame backing and stuck some burlap on. Get it on there good and tight!
  3. Bought some unfinished wood letters from Michael's and used spray adhesive to stick orange glitter all over them.
  4. Used a glue gun to stick the letters onto the burlap.
  5. Tied some fall-ish ribbon onto an autumn floral pick and used a glue gun to stick it to the corner of the frame.
  6. Done.

Sunday, June 30, 2013

Father's Day

I wanted to post this before we left for our family vacation. But I didn't. Sorry. Here it is now! Ready for next year. Taken from one of my favorite LDS Primary songs. Enjoy!


Sunday, March 31, 2013

Happy Easter

I'm just making this by my end-of-month deadline. Easter came early this year! Here was my crafty idea for this month. I wanted my kids to each paint a picture of an Easter egg. I figured I could keep them as part of my Easter decorations. I pictured having three unique but cohesive interpretations of an Easter egg. I even had the kids use matching color paints. But it didn't go **exactly** the way I envisioned.
Here's B's egg. Notice how she outlined the entire egg in yellow. And the use of layering the paint colors to get the right effect for the flowers and stripes. She even signed her work.

Here's A's. She's more symmetrical in her design. She also likes to bring the color all the way to the the edge of the egg. Notice the clean and crisp lines in her work. She keeps it simple.

And here's Z's. It's a rocket ship. Maybe I should've been a little more clear about my expectations. Oh well, this is DEFINITELY Z.
If this isn't quite what you were looking for to do for an Easter craft, here's a lovely Easter subway art that I whipped up. Enjoy!

Wednesday, November 14, 2012

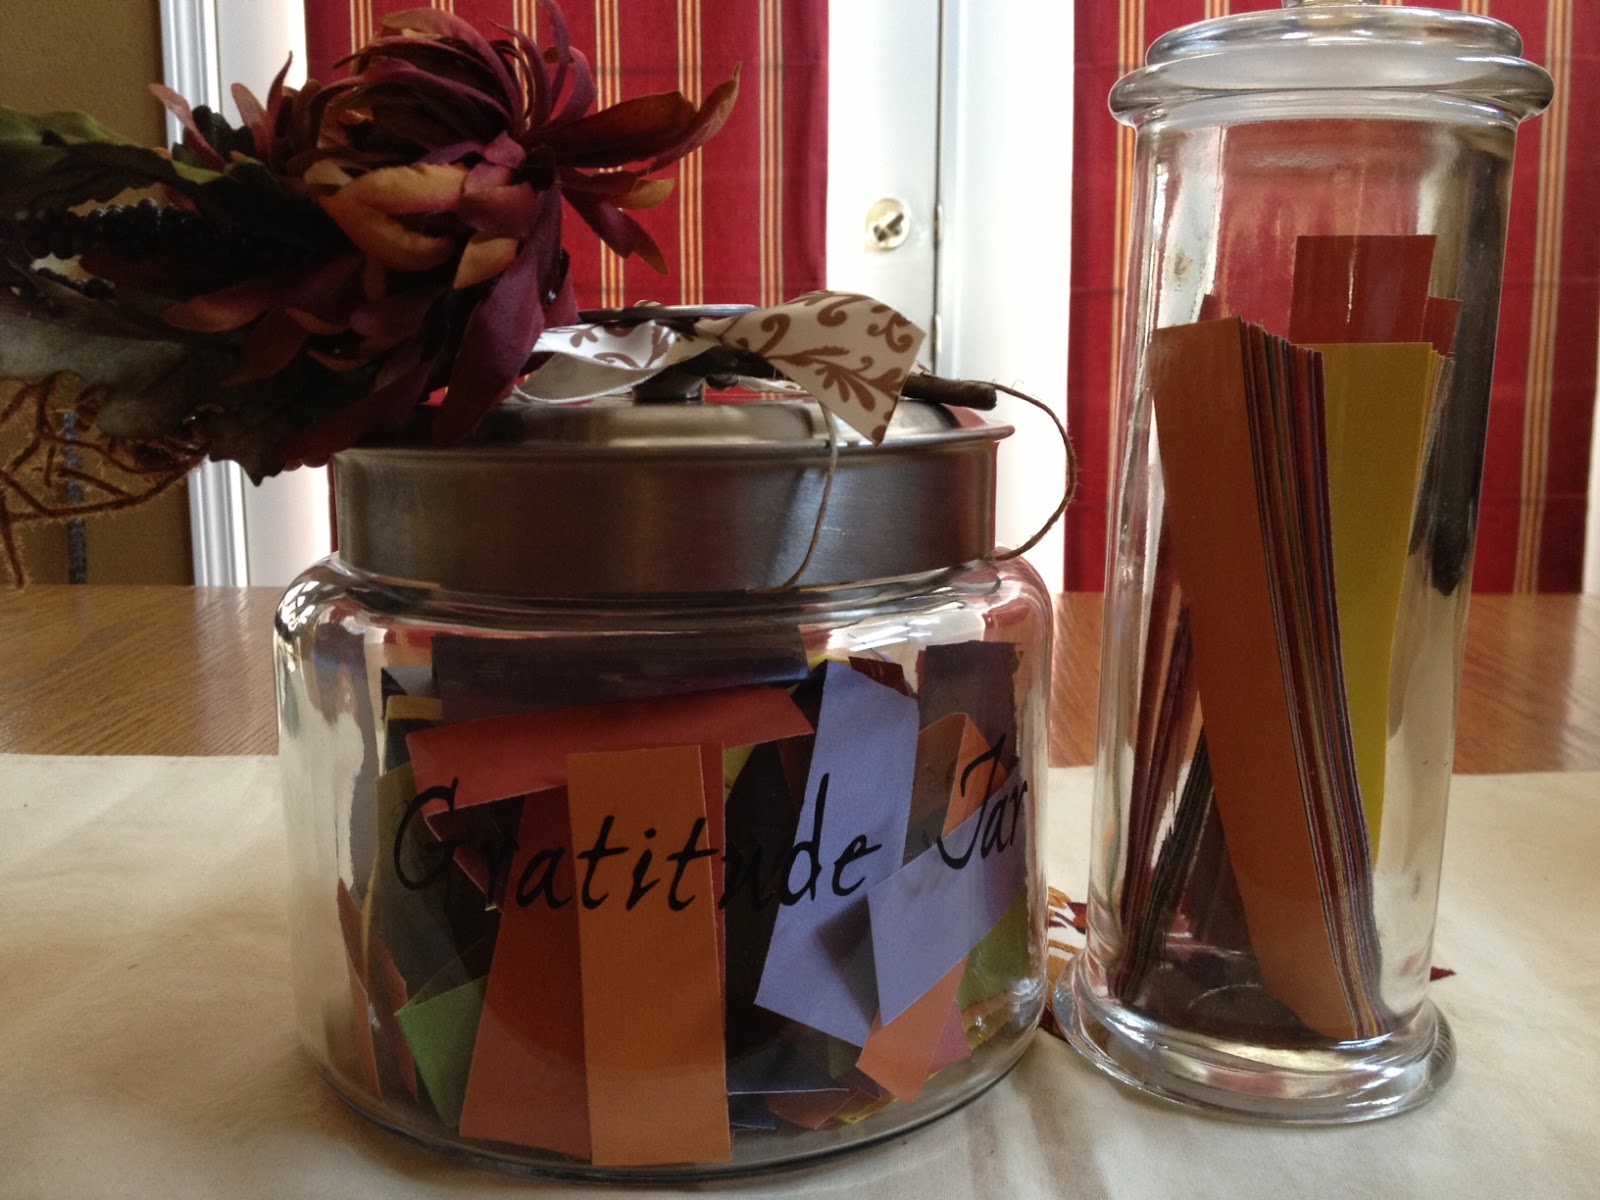
Gratitude Jar

I wanted to capture something for Thanksgiving... something meaningful to us as a family. I wanted the kids to be able to participate as well. They are all old enough to compose their thoughts and express their opinions in positive and productive ways. And I wanted it to look pretty. So here's what I came up with.

Gratitude Jar
Step-by-Step

  1. Get a jar you want to use. I found mine at Walmart in the kitchen supplies aisle. It's about 10 inches in diameter and 5 inches tall with a lovely stainless steel lid. 
  2. Get a separate jar or other container to hold your blank paper slips and a pen.
  3. Cut out vinyl lettering. I used my handy little Cricut.


4. Apply vinyl lettering to jar. I used masking tape to make a level line for the letters.

 5. Cut strips of paper. Mine are 1" by 6".


6. Proudly display and give everyone instructions to write something every day.

Soon you will have it filled up! Have a wonderful and gratitude filled Thanksgiving.


Tuesday, October 2, 2012

Lamp Post - Sign Hanger - Wreath Hanger

Okay, some of you kept asking about my lamp post sign hanger project and wanted me to post the link. Be grateful! I worked on getting this just right. For you.

My dismal front porch was just crying out for SOMETHING! In my mind I kept picturing lights... signs... wreaths... hmmm. A quick visit to Pinterest gave me some ideas.

There was this adorable one

And this cute one

But they were both EXTREMELY SHORT: only about 2 feet (24 inches) tall. My porch needed something substantial! I ended up wandering around HomeDepot like one of those crazy people who have a project to do but NO IDEA how to do it. Yeah, that was me.

What I Bought
(1) 8-ft  4x4 beam (they cut it in half for me for FREE so I ended up with (2) 4-ft lengths)
(1) 5-ft  12x1 board
(1) 5-ft  8x1 board
(1) 5-ft  6x1 board
(1) Small Tube of Liquid Nails Glue
(1) Can of Black Spray Paint
(1) Can of Clear Spray Paint
(1) Package of Sandpaper- various grits
(2) 6-inch long screws
(1) Metal hook 
(1) Solar-powered lighted fence post cap (AWESOME!!!)

4x4 Post. (The basketball is used to show scale.)

Three different width boards. 12x1, 8x1, and 6x1. (Again, the basketball is used to show scale.)
Close up of the footer when all assembled and painted and screwed together.
Close up of hook. I'm sure you can find prettier ones, but who's going to be looking at the hook?
Close up of lighted post cap.


Step-By-Step
  1. Measure and saw off a square section from each of the boards. 
  2. Sand all the wood pieces. 
  3. Paint. I wanted instant gratification so I chose spray paint.
  4. Let dry about an hour.
  5. Sand again and put on another coat of paint.
  6. Let dry about an hour.
  7. Seal all the wood pieces with the clear coat.
  8. Let dry overnight or so it's not tacky to the touch.
  9. Assemble footer. This means you just stack the 3 pieces on top of each other. To make it easier to keep perfectly centered, I traced around each piece with a pencil exactly where it was placed on the one below it.
  10. Glue footer pieces together. Here is where the Liquid Nails came into play. 
  11. Let dry about two hours. I used a vice grip to keep the wood pieces together tightly until they dried.
  12. Screw footer to post. I had my hubby drill holes in the bottom to make life so much easier.
  13. Attach the hook.
  14. Top off with light.
  15. Hang your sign/wreath/whatever.
  16. Admire your work!


And here's my COOL, CREATIVE, and CRAFTY version. And it is 4 feet (48 inches) tall. You can see it from the driveway! I love the way it looks right now. I can't wait to redress it for each season with something new. At night, it casts just a tiny glow... the same amount as those lawn lights... just enough to be charming.


Finished project! (The sign was just something I already had from another project. :)


Total Cost 
For this lamp post sign hanger project including tax: $38.24.
The best part is that I have enough materials left over to make a second one!! I just have to get another lighted post cap ($4.99) and hook ($2.48).